My Experience Migrating Hyper-V Clusters Using System Center Orchestrator 2012
Back in August / September last year, I spent sometime designed a set of Orchestrator runbooks to migrate Window Server 2008 R2 Hyper-V clusters to Windows Server 2012. I wasn’t going to blog this because it was designed to only cater for my company’s environment, not something that’s generic enough for everyone to use. I also wasn’t sure how well I can explain and document these runbooks in a blog post. Few of my colleagues and friends actually encouraged me to blog this one so I’ll give it a try (and not to disclose company related sensitive information).
Background
My employer is one of the biggest two supermarkets and retail chains in Australia. Few years ago, there was a project that implemented a 2-node Windows Server 2008 R2 Hyper-V cluster in each of the 750 supermarkets that owned by my employer. More details about the implementation can be found from this Microsoft Case Study.
Early last year, we have started a project to upgrade the entire System Center suite to System Center 2012 (later on decided to go to R2). A part of this project is also to upgrade 2008 R2 Hyper-V clusters in supermarkets to Windows Server 2012 (and later on decided to go straight to Windows Server 2012 R2).
I have been in my current role for just over 2.5 years now, one thing that I learnt while managing a large retail environment is, that Automation is THE key to our success. No matter what solutions you are planning to rollout to the stores, if you can’t automate the rollout process, your plan is not going to fly. Therefore scripting is pretty much the essential requirement for everyone in my team. And in the office, you hear the phrase “cookie cutter” a lot. Automation standardise and simplifies implementation processes for new technologies. Our job is pretty much to design all kinds of cookie cutters and hand them over to other teams to cut cookies.
For the Hyper-V cluster upgrade, our end goal is that the implementers would enter a store number in the System Center Service Manager 2012 web portal and Service Manager would then kick off a series of Orchestrator runbooks to perform the upgrade. The upgrade would involve the following steps:
- Live migrates all VMs to cluster node 2.
- Evict Node 1 from the 2008 R2 Cluster and rebuild it to Windows Server 2012 R2 using ConfigMgr OSD.
- Migrate all cluster resources from the old cluster on Node 2 (Running Windows 2008 R2) to the new cluster on Node 1.
- Rebuild Node 2 to Windows Server 2012 R2
- Join Node 2 the the new cluster.
I have been asked to assist to design a prototype for step 3 using Orchestrator 2012.
Note: At the time designing this prototype, Windows Server 2012 R2 and System Center 2012 R2 was yet to be released and we had not made decisions to go straight to R2. Therefore my prototype was based on the scenario that we were going to migrate from Windows Server 2008 R2 to 2012 RTM. I had to make some modifications once we have decided to go to 2012 R2. I’ll explain it later in this article.
I firstly scripted the entire cluster migration process in PowerShell, using WinRM and Windows Server 2012 Server Migration Tool. Once the PowerShell script was working 100%, I then broke it up into many small segments and build the Orchestrator runbooks based on this script.
The purpose of this blog post to document my experience designing this prototype. I will provide the runbooks export at the end of this article.
Runbooks Overview
In my prototype, there are 6 runbooks in total. The migration process would go from 01—>02—>03—>04—>05—>06:
- Data Gathering
- Prerequisites Checks
- Export HyperV Config
- Move Cluster Resources
- Import HyperV Config
- Add VMs to the Destination Cluster
Runbooks Prerequisites
These runbooks require the following prerequisites:
- The Orchestrator Runbook Service account needs to have local admin rights on both Hyper-V cluster nodes (this is because it’s only a prototype so I didn’t bother to setup proper service accounts for each activity).
- Hyper-V PowerShell module is installed on both old and new cluster nodes (Microsoft did not provide a Hyper-V PS module out of the box in Windows Server 2008 R2. So for 2008 R2, we used the one from CodePlex).
- WinRM is enabled on both cluster nodes.
01. Data Gathering
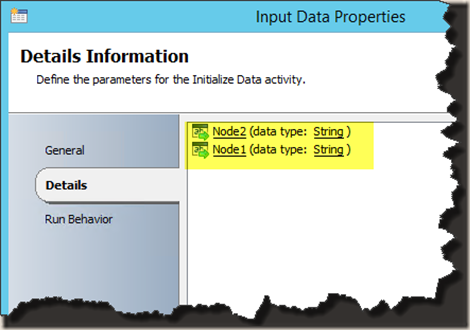
The purpose of the first runbook “Data Gathering” is to connect to both cluster nodes and gather few information for the subsequent runbooks. The only information that the operator needs to provide is the server names for both nodes.
It doesn’t matter which node is node 1 and which one is node 2, the runbooks will figure out the source and destination clusters by comparing the OS versions.
The very first step for runbook 01 is to check if the account it’s running under has local admin rights on both clusters. It will only continue of if it can connect to the admin$ share on both clusters.
This runbook will also get the FQDN, OS versions, WinRM ports from each cluster. With regards to WinRM port, because VMM 2008 and VMM 2012 use different WinRM ports when installing VMM agents on the Hyper-V hosts, so in order for other runbooks to connect to each Hyper-V cluster, we need to know which port to connect to (in 2008, port 80 is used and in 2012, it’s the default port of 5985).
02. Prerequisite Checks
This runbook performs the following checks:
-
OS Version Validation – Both cluster nodes cannot be on the same version, and the minimum OS major version must be 6.1 (Windows Server 2008 R2).
-
Cluster Validation – Make sure Windows Failover cluster role is installed on both nodes.
-
Identify Source & Destination Cluster – based on the Windows OS major version, the one with lower version is the source cluster, and the higher version one is the destination cluster.
-
HyperV Validation – Make sure Hyper-V role is installed on both cluster nodes.
-
Check Cluster Nodes Count – Make sure both source and destination clusters only have 1 node at this time.
-
Smig (Server Migration Tool) Feature Validation – Checks if Server Migration Tool is enabled on both clusters and if it is enabled, are both clusters running on the same version of Server Migration tool.
If step 6 (Smig Feature Validation) failed, Step 7 to Step 10 are performed to configure Smig on both clusters:
-
Create Smig Package on Destination Cluster – this step uses “smigdeploy.exe” on the destination cluster to create a smig package based on source cluster’s OS version.
-
Copy Smig Package To Source Cluster – This step copies the package on the destination cluster created in step 7 to the source cluster
-
Register Smig On Source Cluster – After step 8 has copied the package to the source cluster, this step registers the smig package on the source cluster.
-
Smig Feature Re-Validation – performs the same validation as step 6. by now, the server migration tool should be fully configured on both source and destination clusters.
-
Process Prerequisites Checks Result – consolidates results from each prerequisite checks. Continue to Runbook 03 if passed all prerequisite checks.
03. Export HyperV Config
This runbook exports the HyperV configurations on the source cluster using Server Migration tool and then copies the export to the source cluster. The following activities are performed in this runbook:
-
Shutdown VMs on source cluster – This activity shuts down all virtual machines that are currently running on the source Hyper-V cluster.
-
Remove Cluster Resources on Source cluster – because Server Migration tool does not support migrating clusters, so all virtual machine cluster resources needs to be removed from the source cluster.
-
Export HyperV Config From Source Cluster – now, none of the virtual machines are hosted on cluster, they are rather standalone VM’s (Not HA’d). we can now export Hyper-V configurations on the source cluster node using the Server Migration tool Powershell cmdlet Export-SmigServerSetting.
-
Delete Previous Export From Destination Cluster – if there is a copy of previously created Hyper-V smig export on the destination cluster, this step will delete it so we can then copy the most recent copy to destination cluster node next.
-
Copy Hyper-V Export to Destination Cluster – copy the export created in step 3 to the destination cluster node.
Note: for all file copy activities in my runbooks, I couldn’t run them within a Powershell remote session because I am not using CredSSP in my runbooks so I can’t connect to a remote UNC path within a PS remote session – because of the second-hop constraint. Therefore I’m simply running the robocopy command:
I remember I read somewhere that Orchestrator uses PsExec.exe under the hood when running a command against a remote computer. PSExec.exe uses RPC rather than WinRM.
06.Verify HyperV Export Copy on Destination Cluster – after the Hyper-V export has been copied to the destination cluster, this runbook verifies the export files by comparing the file count between the copies located on the source and destination locations. if this validation is passed, the next runbook is then triggered.
04. Move Cluster Resources
This runbook moves cluster resources (cluster shared volumes) to the destination cluster.
-
Delete VM’s on Source Cluster – This step deletes all virtual machines from the source node. at this point, the VMs are not hosted on the source cluster anymore, they are standalone non-HA’d VMs. they need to be deleted from Hyper-V now.
-
Move CSV’s – This steps moves all cluster shared volumes from the source cluster to the destination cluster. this is a tricky one. In order to keep track of the CSV names, I had to move only one CSV at a time. To move it, I firstly save the name of the CSV to a variable, then delete it from the source. after it’s deleted, I can then pick up this particular CSV as available storage in the new cluster. After I added the available storage in the new cluster, I rename the CSV to the name I captured from the source cluster. This is why we can only move one CSV at a time, if we move more than one, there is no way I can identify which one is which in the new cluster. For more information about this process, please refer to the PS script in this activity.
-
Delete CSV’s From Source Cluster – Now that the CSV’s are all moved to the destination, they can be deleted from the source cluster.
-
Delete Available Storage From Source Cluster – After the CSVs are deleted from the source, they are still showing as available storage in the source cluster. This is VERY IMPORTANT, these available storage MUST BE deleted. Without this step, Server Migration Tool will not work 100%. I got stuck here for few days when I was designing the runbooks. Server migration tool does not like clusters. without this step, I was keep getting NTFS related errors when importing the Hyper-V export to the destination cluster using Server migration tool. but if I ran the import again after the first attempt failed, it would work second time. After I added this step in the runbook, the problem went away. so in another word, everything has to be completely removed from the source cluster before we can import the Hyper-V configuration to the destination cluster.
05. Import HyperV Config
now that we have all the darts lined up, it’s time to import the Hyper-V configuration to the destination cluster. This runbook only contains one activity:
- Import HyperV Config on Destination Cluster – the script in this step firstly make sure all CSV’s are online, then perform the import using Import-SmigServerSetting cmdlet from Server Migration Tool PS snap-in. The HyperV export created from the source cluster also contains information such as Hyper-V virtual switches. after I imported the config to the destination cluster, I do not have make any additional configuration changes as Server Migration tool took care of everything.
06. Add VMs to the Destination Cluster
Now that all VMs are migrated to the destination cluster node. this runbook add them to the destination cluster and starts them up. This runbook contains 2 steps:
-
Add VMs to Cluster – This step adds all VMs to the cluster.
-
Start VMs – This steps powers on all VMs.
Test Drive Results
when we tested this prototype in our lab, with 3-4 VMs hosted on the cluster, These runbooks took around 10-15 minutes to run. – And all the wait I hardcoded in my scripts contributed to this time frame as well. It is completely automated, all we did was to enter the NetBIOS names of the 2 cluster nodes to kick off the first runbook, and sat back, watching Orchestrator to progress with each activity.
Story about Windows 2012 R2
So I finished the prototype by the end of September last year and went on holidays for 4 weeks. Windows 2012 R2 was released while I was on holidays. After I came back, my colleague told me these runbooks didn’t work when migrating from Windows Server 2008 R2 to 2012 R2. because Server Migration Tool only supports migrating from n-1 version when come to Hyper-V. When creating the 2012 R2 version of the smig package for 2008 R2, Hyper-V is not available. However, migration from Windows Server 2012 to 2012 R2 still works using this runbook prototype (because it’s only 1 version behind).
Microsoft advised there is an unsupported undocumented way to make Hyper-V available in the package but we have decided not to use this method because it’s not supported.
After logged a support call with Microsoft and they have advised to just import the Hyper-V VM’s (the xml) to the new cluster. So I spent another couple of hours to modify the existing runbooks to ditch Server Migration Tool and directly import the VM’s XML into Hyper-V. This has made the runbooks simpler than before, but the drawback is that other Hyper-V settings such as virtual switches are not migrated across. Luckily since we have cookie cutters for everything, it’s a no brainer for us to make sure the Hyper-V host servers base build includes the virtual switches creation.
What happened next?
I handed the prototype to some other people and they have then spent few months enhancing it and built the rest of the store upgrade / conversion process based on this prototype. I can’t really disclose too many details about this (at least not at this stage). It has now grown to a monster with many runbooks and integrated with few other System Center 2012 products.
Summary
The purpose of this post is to share my experience of designing this specific “cookie cutter” prototype. I hope this would help someone when performing similar kind of tasks.
Both versions of the runbooks can be downloaded from the links below:
Windows Server 2012 version using Server Migration Tool
Windows Server 2012 R2 version without Server Migration Tool
Note: I have removed all the email activities from the runbooks exports from the links above.
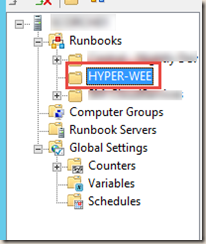
Just another quick note about the runbooks – When I created these runbooks, I created a folder called “HYPER-WEE”, as a joke. After all the runbooks were finalised, I realised it’s too hard to rename this folder because it’s hardcoded in each Invoke Runbook activity:
I didn’t bother to rename the folder and update all the runbooks. So if you have downloaded and imported the runbook, you’ll see it:
Lastly, as always, please feel free to contact me for any questions or issues.


Leave a comment