Using Royal TS for PowerShell Remote Sessions
Background
I have used many Remote Desktop applications in the past. I have to say Royal TS is the one that I like the most! Recently, I showed it to one of my colleagues, after a bit of playing around, he purchased a license for himself too.
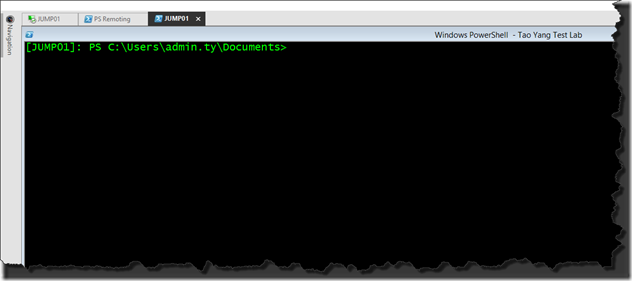
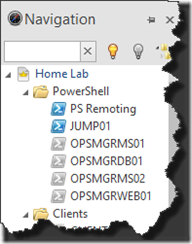
Today, my colleague asked me if I knew that Royal TS is also able to run external commands, and he thought it’s pretty cool that he’s able to launch PowerShell in the Royal TS window. Then I thought, if you can run PowerShell in Royal TS, we should be able to establish PS remote sessions in Royal TS too. Within 10 minutes, we managed to create few connections in Royal TS like these:
In this post, I’ll go through the steps I took to set them up.
Connections to Individual Servers
To create a connection to an individual server,
- Choose add->External Application:
- Enter the following Details:
- Display Name: The name of the server you want to connect to.
- Command: C:\Windows\System32\WindowsPowerShell\v1.0\powershell.exe
- Arguments: -NoExit -Command “Enter-PSSession $CustomField1$”
- Working Directory: C:\Windows\System32\WindowsPowerShell\v1.0
On the icon button next to the display name, choose “Use Application Icon” if you want to.
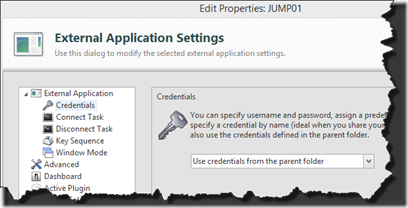
- Choose a Credential if you want to connect using an alternative credential
If you choose to use an alternative credential, you must also tick “Use Credentials” box under Advanced tab:
- Enter the remote server name in Custom Field 1:
Note: in the arguments field from step 01, I’ve used a Royal TS variable $CustomField1$ as the name of the computer in the Enter-PSSession command. It is more user friendly to use the Custom Field for the computer name, rather than modifying the argument string for each connection that you wish to create.
Create An Ad-Hoc Connection
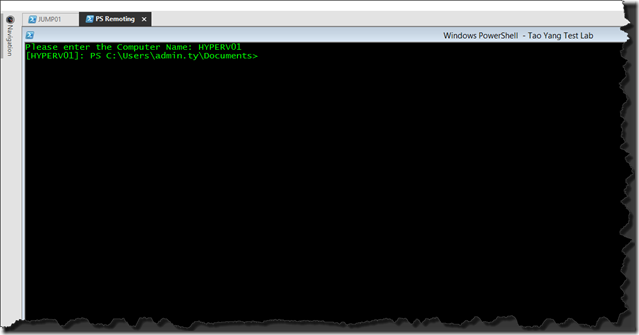
You can also create a connection in Royal TS for Ad-Hoc connections. In this scenario, you will need to enter the remote computer that you wish to connect to:
After the the computer name has been entered, the connection is then established:
To create this connection in Royal TS, instead of using the Custom Field 1 for the computer name, I’ve added an additional PowerShell command in the Arguments:
Arguments: -NoExit -Command “$Computer = Read-Host ‘Please enter the Computer Name’; Enter-PSSession $Computer”
The Custom Field 1 is no longer required in this scenario. Everything else is the same as the previous sample (for individual computers).
Other Considerations
Maximised PowerShell Window
You may have noticed from the screenshots above, that the PowerShell windows are perfectly fitted in the Royal TS frame. this is because I am also using a customised PS Module that I’ve written in the past to resize the PoewerShell window. Without this module, the PowerShell console would not automatically fit into the Royal TS frame:
If you like your console looks like the left one rather than one on the right, please follow the instruction below.
- Download the PSConsole Module and place it under C:\windows\system32\WindowsPowerShell\v1.0\Modules
- Modify the “All Users Current Host” profile from a normal PowerShell window (NOT within PowerShell ISE). If you are not sure if this profile has been created, run the command below: ```powershell if (!(test-Path $profile.alluserscurrenthost)) {New-Item -type File -Path $Profile.alluserscurrenthost}
<a href="https://blog.tyang.org/wp-content/uploads/2014/12/image36.png"><img style="background-image: none; padding-top: 0px; padding-left: 0px; display: inline; padding-right: 0px; border: 0px;" title="image" src="https://blog.tyang.org/wp-content/uploads/2014/12/image_thumb36.png" alt="image" width="611" height="115" border="0" /></a>

After the profile is created, open it in notepad (in PowerShell window, type: **Notepad $Profile.AllUsersCurrentHost**) and add 2 lines of code:
```powershell
import-module PSConsole
Resize -max
After saving the changes, next time when you initiate a connection in Royal TS, the console will automatically maximise to use all the usable space.
Note: Because most likely you will be using an alternative (privileged credential) for these PS remote sessions. therefore the resize console commands cannot be placed into the default profile (current user current host). It must be placed into an All users profile. And also because the resize command only works in a normal PowerShell console (not in PowerShell ISE), therefore the only profile that you can use is the “All Users Current Host” profile from the normal PowerShell console.
Alternatively, if you do not wish to make changes to the All Users Current host profile, you can also add the above mentioned lines into the Royal TS connection arguments field:
i.e.
Arguments: -NoExit -Command “import-module psconsole; resize -max; Enter-PSSession $CustomField1$”
Duplicating Royal TS Connections
If you want to create multiple connections, all you need to do is to create the first one manually, and then duplicate it multiple times:
When duplicating connections, the only fields you need to change are the Display Name and CustomField1.
WinRM configuration
Needless to say, WinRM must be enabled and properly configured for PS remoting to work. this is a pre-requisite. I won’t go through how to configure WinRM here. Someone actually wrote a whole book on this topic.
Conclusion
I’d like to thank Stefan Koell (blog, twitter), the Royal TS developer (and also my fellow SCCDM MVP) for such an awesome tool. This is now probably THE most used application on all my computers ![]() .
.
If you haven’t tried Royal TS out, please give it a try. Other than the obvious Windows version, there are also a Mac version, an iOS version and an Android version.


Leave a comment