My Journey to a Smarter Home (Part 2)
This is the 2nd part of the blog series. I have covered my home network setup using Ubiquiti Unifi devices in part 1, you can find it here. In this part, I will discuss the home automation solutions I have put in place using various products from Xiaomi and their Mi Home ecosystem partners.
My cousin is a HUGE Xiaomi fan. Back in 2013, during my holiday in China, he showed me his Xiaomi phone and the Mi Box. I “felt in love” with Xiaomi products ever since. Xiaomi is a fairly young company, only founded in 2010. It has pretty well, currently ranked number 6 in the top 10 mobile phone brand globally. In addition to the mobile phones and other Android powered devices that the they are known for, Xiaomi has expanded its portfolio to home automation and other general household products. It also has established a very successful ecosystem allowing other companies to make products that works with each other. In this blog post, I’m going to cover all the products that I using that are part of the Mi Home (米家, Mi Jia) ecosystem. Some products are not actually made by Xiaomi.
Note: Xiaomi is huge in China, and there are a lot more than what you can purchase outside of China. I order my Xiaomi products from China’s most popular online shopping site taobao.com (owned by Jack Ma’s Alibaba), and use a shipping agent based in Shanghai to forward my purchase to Melbourne. Xiaomi has an official online store on taobao.com. When I purchase stuff from taobao.com, I get the sellers to send all my parcels to a shipping agent. Once everything is delivered to the shipping agent, I’d ask them to re-package / consolidate all the parcels, then ship to Melbourne. I can choose to ship by air or by land and sea. It takes 4-5 business days by air and 5-6 weeks by sea. I have to say, 4-5 days is REALLY good down here! Based on my experience, if I buy something located in Melbourne from eBay, it normally take over a week for the local parcel to arrive. Amazon Prime sometimes takes 4 days to get the parcel to me, and their warehouse is 15 minutes drive from my house! If someone asks me what Xiaomi products do I have, I’d say it’s better to list what I don’t have. If I am to list every Xiaomi product I own, I’ll definitely miss some, but here’s an incomplete list, just to get some ideas:
Mi Band (fitness band), Mi Box (android TV set top box), LED USB lights, USB fans, Yeelight LED desk lamps, Yeelight Light bulbs, Yeelight Ceiling Lights, security cameras, sun glasses, blue light protection computer glasses, power banks, tablet and mobile phone, electric shaver, shower towels, gloves, water quality tester, carry-on suitcase, Bluetooth speakers, pens, dashcam, action camera, air purifier, Smart Home Automation suite, Wifi enabled power boards and power plugs, USB chargers, headphones, selfie sticks, walkie talkies, flashlight, screwdrivers etc..
My wife thinks I’m obsessed with Xiaomi (but yet, she’s using many of these products too, i.e. she’s on her 3rd Mi Band…).
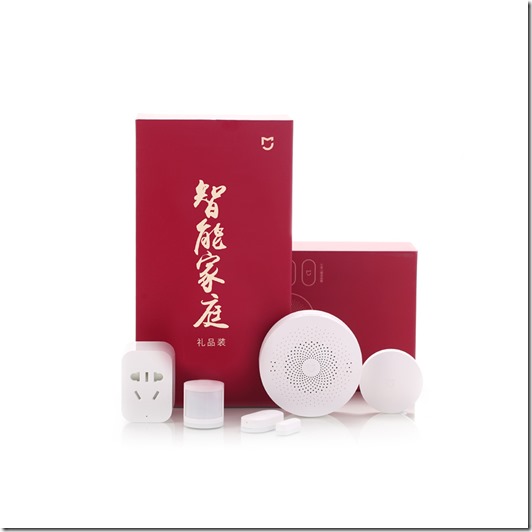
Couple of years ago, I purchased a Xiaomi’s smart home kit and started my journey. it contains the following 5 items:
- A Multifunctional Gateway
- A wireless programmable button
- A Wifi enabled power plug
- A motion sensor
- A window / door sensor set
This is a good starting point, but it does not contain everything in their product catalog. Luckily, you can also purchase these items individually. Since everyone’s requirements are different, the automation scenario I created at my house may not apply to you, but I will go through some of the key components I have used so you have an idea how you can get them working for you.
Muitifunction Gateway
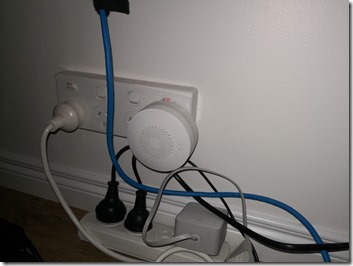
This is the central control unit, the automation engine for all the scenarios you will setup. All you need is plugging this on your power point on the wall, and connect it to Wifi using the Mi Home mobile app. It also acts as a night LED light, a door bell (coupled with the wireless button), an Internet radio and home alarm (coupled with various sensors).
I have placed it in the center of the house, behind the digital piano so it’s hidden from view.
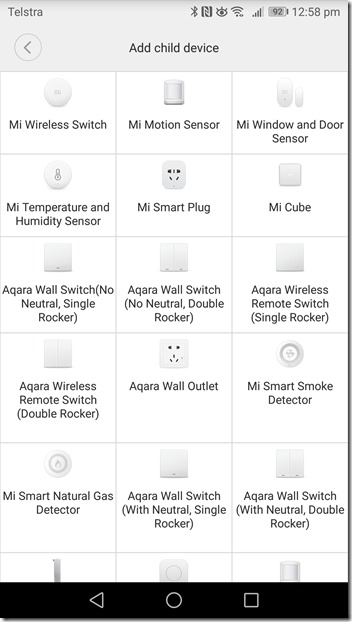
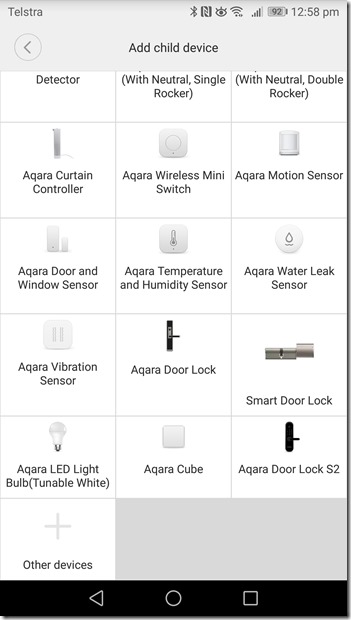
It supports a range of child devices, such as wireless buttons, smart power plugs, Mi Cube controller, temperature and humidity sensors, motion sensors, window / door sensors, LPG gass detectors, water leak sensors, etc. some of these devices are from Xiaomi, some are from their partners such as Aqara, Honeywell, etc.
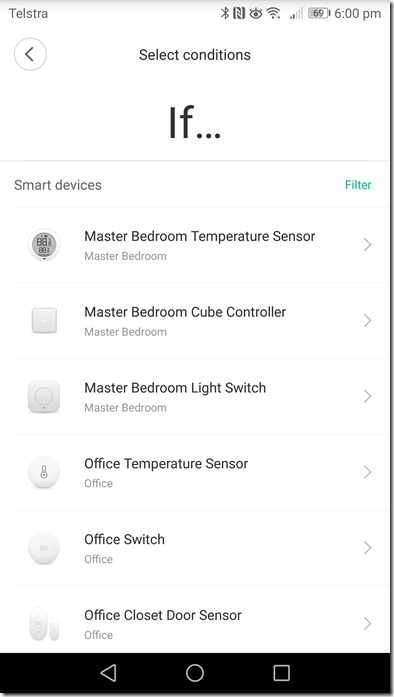
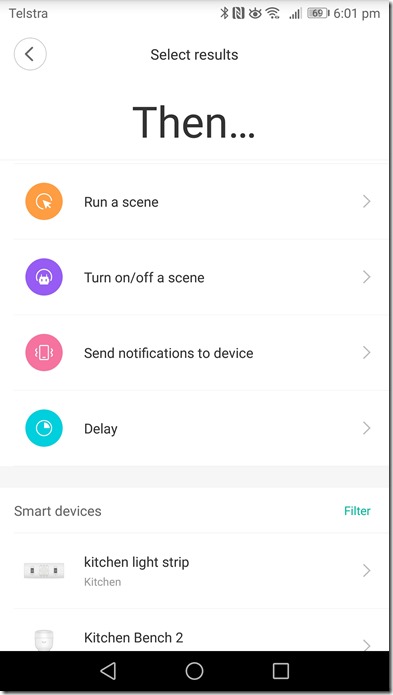
Once the child devices are added, you can create “Automation Scenes”. They are simply If
Yeelight Lights
When I started looking for smart lights few years ago, the major player down here are the Philip Hue light bulbs. It costs $89 per light bulb, which I think it’s insanely expensive! Yeelight is one of the major brands in the Mi Home ecosystem. The Yeelight colour light bulb is CNY ¥99 each, which is only around AUD $20. With such a big price difference, I bought couple to try out. After tried it, I was really impressed, and now, my whole house are powered by Yeelight. Now, even if Philip Hue drops its price to the same as Yeelight, I’d still stick with Yeelight, because all the integration capabilities it brings with Mi Home, and Google Home (which I’ll discuss in the next blog post).
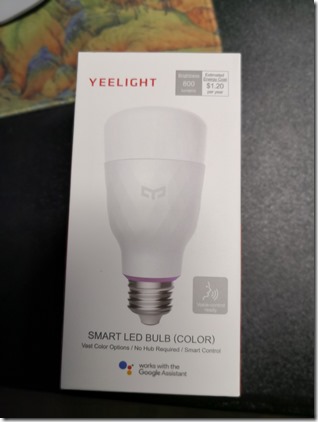
The light bulbs support 16 million colours. I’ve been using them for couple of years now, all the original ones are still working, I haven’t had to replace any of them yet. Few months ago, Yeelight has released the 2nd generation light bulbs. the 2nd gen costs CNY ¥129 (AUD $26). The 1st gen is 600 lumen, 2nd gen is 800 lumen. Although I have purchased few 2nd gen Yeelight light bulbs, I haven’t had change to use them yet (the one in the picture above is the 2nd gen model).
I also have few Yeelight LED light strips. they are 2 metres in length, it comes with double-sided tapes. You can stick it anywhere you want to. Same as the light bulbs, you connect the light strip to your wifi network. You can change colour manually, or select the “flow” mode to let it change the colour by itself.
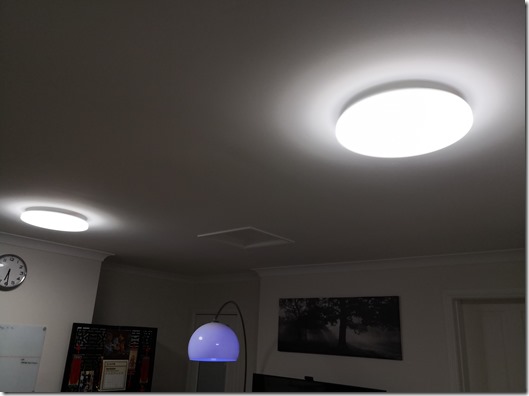
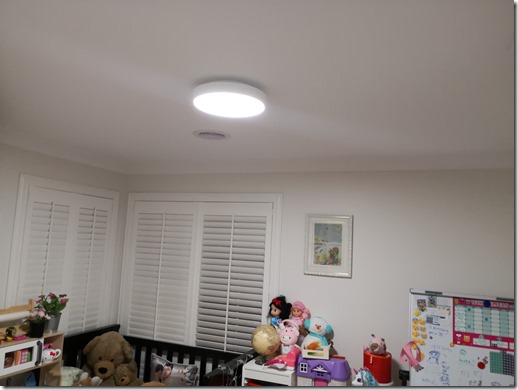
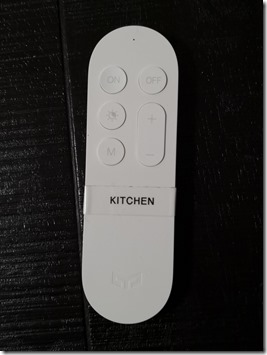
I also have 11 Yeelight ceiling lights installed in the house. The ceiling lights come in different sizes, and in addition to be managed by Mi Home via WiFi, they also ship with bluetooth remote controllers, Each ceiling light can be managed by multiple remotes, and each remote can manage multiple lights.
2 large ceiling lights in my office:
a small ceiling light in my daughter’s study:
Remote controller:
These ceiling lights are not coloured. They only support variations of white colours. You can change the warmth and brightness of the lights. The “M” button on the remote changes the lights to moon lights, which is great for night time:
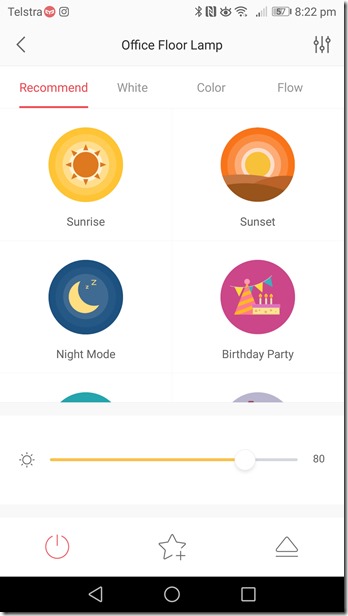
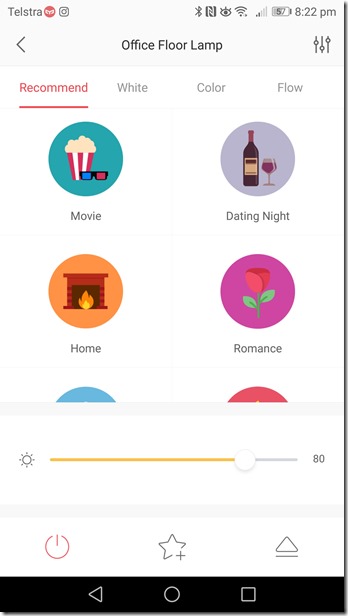
Yeelight also has it’s own mobile app. It provides more capability than the Mi Home app. In Yeelight app, you can group multiple lights together and manage them as one entity (i.e. your bedside lights), and you can create or apply existing scenes to your lights (i.e. dimmed blue lights when you are watching movies, or simulating sunset before you going to bed by gradually dim the lights over a period of time).
All the Yeelight products connect directly to your WiFi network, it does not require the Xiaomi multifunctional gateway to operate, but you can use the gateway child devices such as wireless buttons, sensors, and cube controllers to control these light bulbs.
Having a young child at home, for safety pre-cautions, we don’t want my daughter to use the light switch on the wall – it can be dangerous, especially if her hands are wet. Right now, other than approx. 10 downlights that are just normal lights, all other lights, lamps etc. are powered by Yeelights. I use programable wireless buttons, remote controllers and cube controllers to control the lights. My daughter never has to touch the power switch on the wall ever again.
I have 2 closets at home, by using the window / door sensor, I was able to automatically turn on the light when the door is opened, and automatically turn off the light when I shut the door
Programmable Controllers
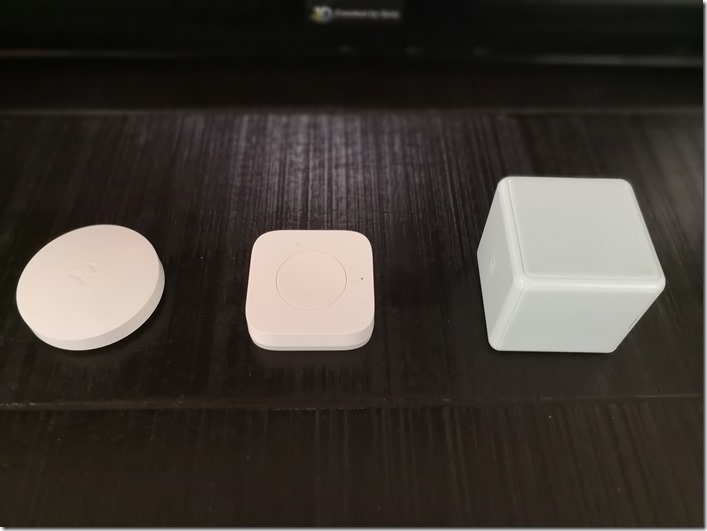
At the moment, I am using 3 different programmable controllers. As shown above, from left to right, they are the Xiaomi wireless button, Aqara wireless button, and the Xiaomi cube controller. All of these devices are managed as child devices in the multifunctional gateway. They have different patterns that you can program:
- Xiaomi wireless button supports:
- single press
- double press
- long press
- Aqara wireless button supports:
- single press
- double press
- long press
- shake
- Xiaomi cube controller supports:
- flip 90 degrees
- flip 180 degrees
- shake
- pushing on a flat surface
- spin on a flat surface
- tap flat surface twice
The Xiaomi and Aqara wireless buttons come with double sided tape, you can stick them on a flat surface (i.e. next to your regular wall power switch for your lights).
I have 3 cube controllers at home, in different colours, mainly used by my daughter to control the lights.
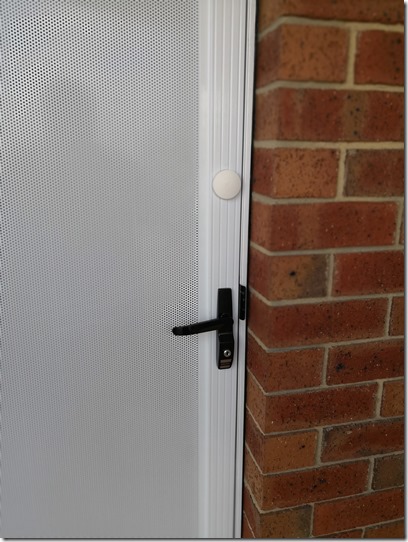
I also placed a Xiaomi wireless button on the main entrance security door, acts as the doorbell. when someone presses it, the multifunction gateway makes doorbell sound so you know someone is at the front door. It also sends a push notification to your phone via the Mi Home app, so you know someone has pressed the doorbell in case you are not home.
Sensors
I have placed the following sensors around the house:
Temperature sensors
there are 3 different types of temperature sensors:
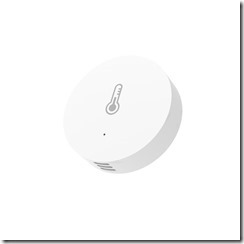
Xiaomi temperature sensor:
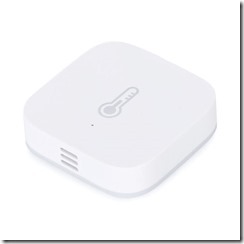
Aqara temperature sensor:
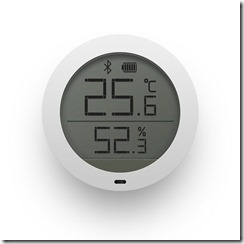
Xiaomi Bluetooth temperature sensor:
The first one from Xiaomi on the list is the basic one. it detects temperature and humidity. you can view the readings via the Mi Home app.
The second one is from Aqara. in addition to the temperature and humidity, it also detects the air pressure, all viewable via the Mi Home app too.
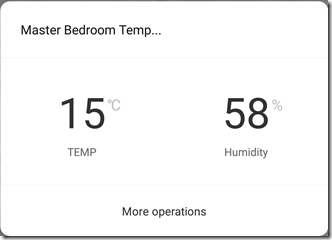
The last one is the Xiaomi Bluetooth temperature sensor. since my Yeelight ceiling lights are also acting as Bluetooth bridges, I don’t have to have my phone near this temperature sensor to read the readings on the app. It connects my environment via the ceiling lights. I can read the temperature and humidity via Mi Home as long as I am in the same Wifi network.
In the past, when I had a lot of computers in my lab, during summer, in order to make sure my computers don’t get overheated, I used to have a fan pointed directly to my computers. I had a sensor near the computers, and I created an automation scene that if the temperature is above 26 degrees, turn on the power plug where the fan is plugged into, and turn off the power plug when it’s below 23 degrees.
Once a while, I also get push notifications on my phone when the temperature is too low or too high.
motion detection sensors and door / window sensors
I have placed a motion detection sensor by the front door. I can program the gateway to turn any particular lights on at night when movements are detected. Also when the alarm is activated, any detected movement will trigger the alarm.
Similar to the motion sensor, the door / window sensor can also be used together with the alarm. Other than the scenario where I used it to control the lights inside my closets, I also used to have this controlling the air purifier. Both my wife and daughter have hay fever during spring and summer. If someone opened the window during the day, they may not be able to have a good sleep that night. so I created a scene when the bedroom window is opened, the Xiaomi air purifier in the bedroom will be turned on full blast. This has worked very well.
Plant soil sensor (flora monitor)
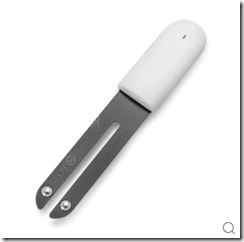
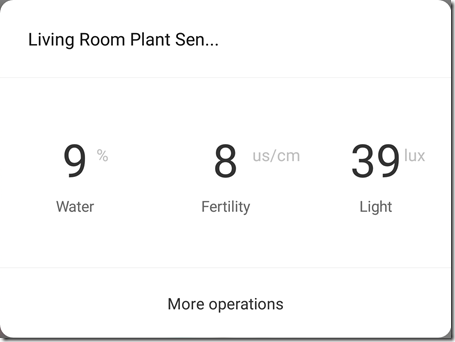
The Xiaomi flora monitor is designed to monitor the soil condition of your plant. It’s connected via Bluetooth – therefore via my ceiling light Bluetooth bridge. it detects water %, fertility and light brightness for your indoor plant. Different types of plants have different requirements. You can create automation scenes that send you push notifications if any of these figures are too low or too high (i.e. time to water your plant).
Gas sensor
The Honeywell gas sensor is supposed to be placed around 4 metres away from your oven. It’s a connects to your system as a child device to the gateway. You can use it to monitor gas leak.
Water leak sensor
The water sensor is designed to detect water leak. I have recently purchased one and placed it right below the kitchen sink. I haven’t received any notification yet (and I hope it stays that way).
Power boards and plugs
Xiaomi offers several power boards and plugs. some are Wifi enabled, some are not. I am using few Wifi enabled ones.
I have 3 monitors on my desk and my Intel NUC always stays on. Every night, instead of turning off all monitors one at a time, I am connected the power board that all my monitors are connected to to a power plug. I use a Xiaomi wireless button to turn on / off the power plug. So with one single press, all my monitors are off.
I used to have a fish tank. the lights in the fish tank should be on around 8 hours a day. I used a power plug and set a timer in Mi Home, so the lights are automatically turned on and off at the exact time each day.
As you can see from the picture above, these plugs are not universal, some countries such as UK are not supported.
Conclusion
In this part of the blog series, I have shown how I used the Xiaomi Mi Home ecosystem to simplify our day-to-day living. There are many home automation products in the market right now. It would be a nightmare if I have to use 10 different apps to monitor different devices. Xiaomi’s Mi Home ecosystem has worked so well, it enables different vendors to produce different products that work together. i.e. I can use Aqara wireless button to control Yeelight lights via the Xiaomi gateway. Once I connect Mi Home and Yeelight to Google Home, I can also use my voice to control these devices.
There are still few devices in Mi Home catalog that I haven’t had chance to try out yet (i.e. Aqara vibration sensor, Honeywell smoke detector, etc.). Some of them are currently in a container in the ocean on the way to me. I may write follow-up posts if they are worth talking about.
Although I purchased most of the Xiaomi products from the Chinese site taobao.com, non-Chinese speaking folks can get most of these devices from English sites such as amazon.com and alibaba.com.
In the next post, I’ll share my experience with Google Home.
Please feel free to reach out to me if you want to discuss more on this topic.











Leave a comment